Introduction to New Tools
The command prompt, or command line, is a way for you, a human user, to tell the computer what programs to run. This is discussed more in the chapter on Unix, but in this chapter, we’ll walk you through the process of installing what you need.
In order to work with Unix commands, you need access to a command prompt. If you have a Mac, you have the Terminal application installed by default, and you’ll use that.
If you have a PC with a Windows operating system, you’ll need to install something called Git Bash – see below. Windows has its own command prompt, but it won’t respond to the unix-style commands that we’ll be using in this course.
Installing Git Bash
Go to this site and install git for Windows. (Click on Download. All of the options say preview and beta. Don’t worry about that. It’s stable enough for our use. Do choose a “featured” download, currently “Full installer for official Git for Windows 1.9.0”.)
Note
Don’t change any of the default configurations during the installation! Most importantly, leave the setting on “Checkout windows-style, commit unix-style line endings.”
When you download this, you’re also installing a bunch of other software, some of which we’ll talk about a little later in the course. All of it can be helpful for software development in various ways, but most of it isn’t relevant for us now.
However, this software will allow everyone in class, whether they use a Mac operating system, a Windows operating system, or a Linux operating system, to use identical (or in some cases almost identical) Unix commands, since the way you navigate your file system (more about this in the Unix chapter) using git bash is the same as the way Mac users will use their Terminal application.
To launch Git Bash, just choose it in the usual way that you launch other programs in Windows.
Customize the git bash display
There are a couple more configuration changes that I highly recommend. You don’t absolutely have to do these, but they’re very useful. Most importantly, they will allow you to cut and paste in the git bash window.
Depending upon what version of Git Bash you download, you may not be able to complete each of these steps in exactly this way. Don’t worry! You can google or reach out for help with changing things about your Git Bash installation. Even if you don’t complete these steps, you can still run Python programs and use the Unix commands we discuss in this book.
- Close the git bash window if you haven’t already.
- In the Windows menu, right click on git bash and choose “Run as Administrator”. This will allow you to change some of the configurations.
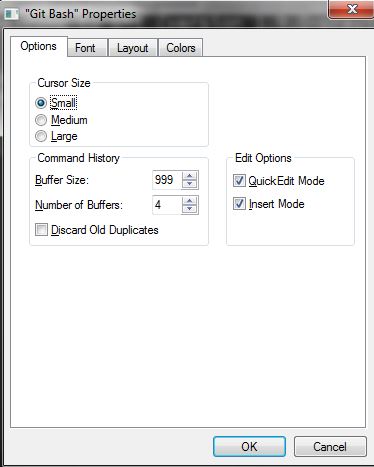
- Right click on the icon in the upper left of the git bash window and choose properties.
- Check the box for Quick Edit Mode. That will let you copy and paste text in the window.
- Change the buffer size to 999. That way it will remember 999 commands in your history.
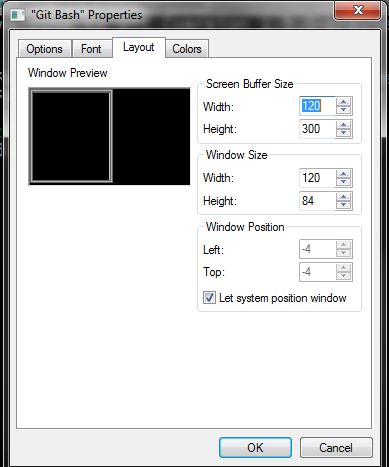
- Under the Layout Tab, you may want to make a wider width. I’ve chosen 120 characters. I also chose a bigger font size for myself, but you may be fine with default font.
- Click OK.